I’d never encountered this type of tile before. After this experience, I realize every time I see it again that if I stare too long, I’ll probably break down and cry. By the end, I felt much like Axl Rose now looks:

Seriously, Axl, maybe it’s time to give up the Navajo-blanket-turned-bathrobe look. Did you get that comped at Harrah’s Cherokee? Like a remote tribesman with an iPhone, another 80s icon has failed to cope with the forward march of time.
But I digress. This post is not about glorious ’80s rock stars and their not-so-glorious current state. No, this post is about something far more sinister. We’re here today to talk about my latest renovation nemesis: Saltillo tile.
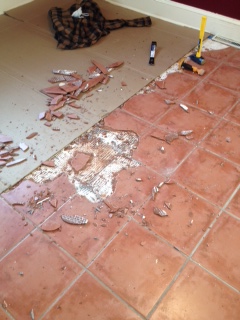
This villain goes by many names: Saltillo, terra cotta, Spanish tile (that’s racist, by the way – it originated in Mexico), or as I call it, Satan’s favorite floor covering. Not only did this reddish, clay tile look horrendous in our blood red dining/kitchen area next to the similarly red brick freplace, but it’s also got a real bad case of the crumbles.
With my spirits flying high from my utter domination of our old cast iron tub, I set out to tackle this Kraken.
It did not go well.
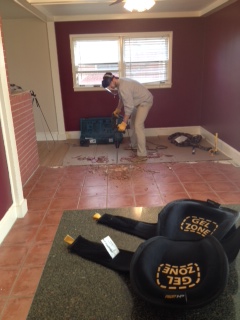
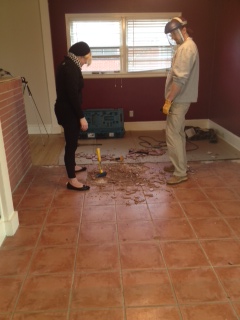
I went through a variety of tools, including the classic chisel-hammer-tap-tap method that you see weak-looking men doing with obnoxious ease all over YouTube. I quickly progressed to an electric hammer/chisel that was perhaps even less efficient (and certainly much louder). By the end, the method I found most effective was to use my trusty claw hammer and brute strength to smash the tile as much as possible and hope that the impact would cause the adhesive to release the majority of the tile instead of crumbling and leaving bits of terracotta all over our subfloor.
Did I mention that the adhesive used in this kitchen was not thin-set mortar but a stronger, stickier mastic? It was. Did I also mention the previous owner used what seemed to be a double layer of adhesive? He did. Evidently he felt there was great risk in this tile trying to escape.
Below are some pictures of how this went along with a video at the bottom. The audio in the video is somewhat terrible, but I tried to give captions and a summary of what is going on. I also sped up the hours that went by with me smashing so you don’t have to endure the full pain of watching me struggle.
If you’re going to try to do a Saltillo tile demo job yourself, make sure you have the following items:
- Chisel
- Claw hammer
- Good work gloves (very important – I wore through a pair of leather work gloves and, by the end, I had blisters on me fingers)
- Eye protection (Dexter mask optional)
- Ear protection
- Respirator (spring for the good one – you’re gonna kick up a lot of earthy dust)
- Patience
- Repressed fury
My First attempts were slow and cautious. Little progress was made:
Clearly I was going to need to upgrade my equipment and efforts…
To make a long story short, here are the rest of the photos at various stages of destruction and exasperation:
If you’d like to watch the video, give it a go below. It’s funny now. It was not funny during the eight hours it took me to do this job. Estimated savings cost of doing this yourself: $1,000. Worth it? Jury is still out.


